Showing posts with label Literacy. Show all posts

Friday, October 23, 2015

Alphabet Must-Haves for Little Learners

There are so many resources for little ones who are learning their alphabet, but which activities are best for your kindergartners or even as a gift to a little learners you know.  Here are my TOP 12 Alphabet Must-Haves for little learners.


Find out how to use these resources in your classroom...


LeapFrog Fridge Phonics Magnetic Letter Set

This resource is great for an alphabet mini-lesson.  Attach the bus to your white board and sing along together to learn or review the alphabet.

Learning Resources Alphabet Soup Sorters

Need a fun alphabet center or small group activity to use with your little learners...these soup sorters are an awesome choice.  Add them to your home center for some engaging and fun learning.

Grandma's Trunk Alphabet Game

This trunk is an adorable mini-lesson activity to do with your whole class or intervention group.  Extend the activity by creating a chart with their predictions of what they think is in Grandma's trunk.

Alphabet Bingo Game

My students do a lot of bingo in the classroom and having an alphabet bingo game available in their literacy centers is definitely a must-have.  Play the game together a couple times, then place it in a center for your little ones to enjoy.

Alphabet Go Fish Matching Card Game

Card games are a hit with little learners and providing them with alphabet cards to play with combine play with learning.  This game is adorable (seriously...I LOVE the images) and ready to go!

Wikki Stix Alphabet Fun Cards for Learning

Letter formation at its finest...with Wikki Stix!  My kiddos love 'playing' with Wikki Stix and these cards make it easy to practice their letters in our writing center.

LeapFrog: Letter Factory

Indoor recess, assessment time, rowdy class that needs a cool-down...time to put on the Letter Factory.  This video is great for teaching little ones their letters and sounds.  Add the LeapFrog Fridge Phonics Magnetic Letter Set...PERFECTION!!!

LeapFrog Scribble and Write

This resource is another one I love for a writing center.  Technology with a stylus...can you say professional learner?  At least, that's what your students will be!

See-Inside Alphabet Peg Puzzle

There are bound to be a few puzzle lovers in your class and adding an alphabet puzzle to your puzzle center is hands-down a necessity.  This one is my favorite because of the keyword or initial sound pictures under each letter.

Deluxe Alphabet Stamp Set

Whether your learners are matching capital and lowercase letters, making their name or segmenting CVC words, this stamp set is perfect for a literacy center.

Tub Of Letter Tiles

Yep, thats it, a tub of letter tiles!  These tiles are perfect for sorting letters by capital and lowercase or for an in my name not in my name sorting chart and segmenting or blending CVC words.  If you don't have a tub of letter tiles in your room...get some NOW!

Hot Dots Jr. The Alphabet Card Set

I love me some Hot Dots and so do my learners.  This card set is perfect for you little ones and there are even more to choice from on their website!  Grab some pens and you can start a Hot Dots center in your classroom.

Need some more ideas for your classroom or little learner, head over to my blog, Mrs. Jones' Creation Station.



Wednesday, September 30, 2015

Phonics and Sight Words with Paint Stir Sticks

Hey y'all, I'm Jessica from The Littlest Scholars! I'm so happy to be blogging here with my I Teach Kinder friends. I'm always looking for new ways to engage my little scholars during small group literacy and these paint stir sticks do just that! Use them for word work, phonics, sight words--the possibilities are endless. Here's how to get started...


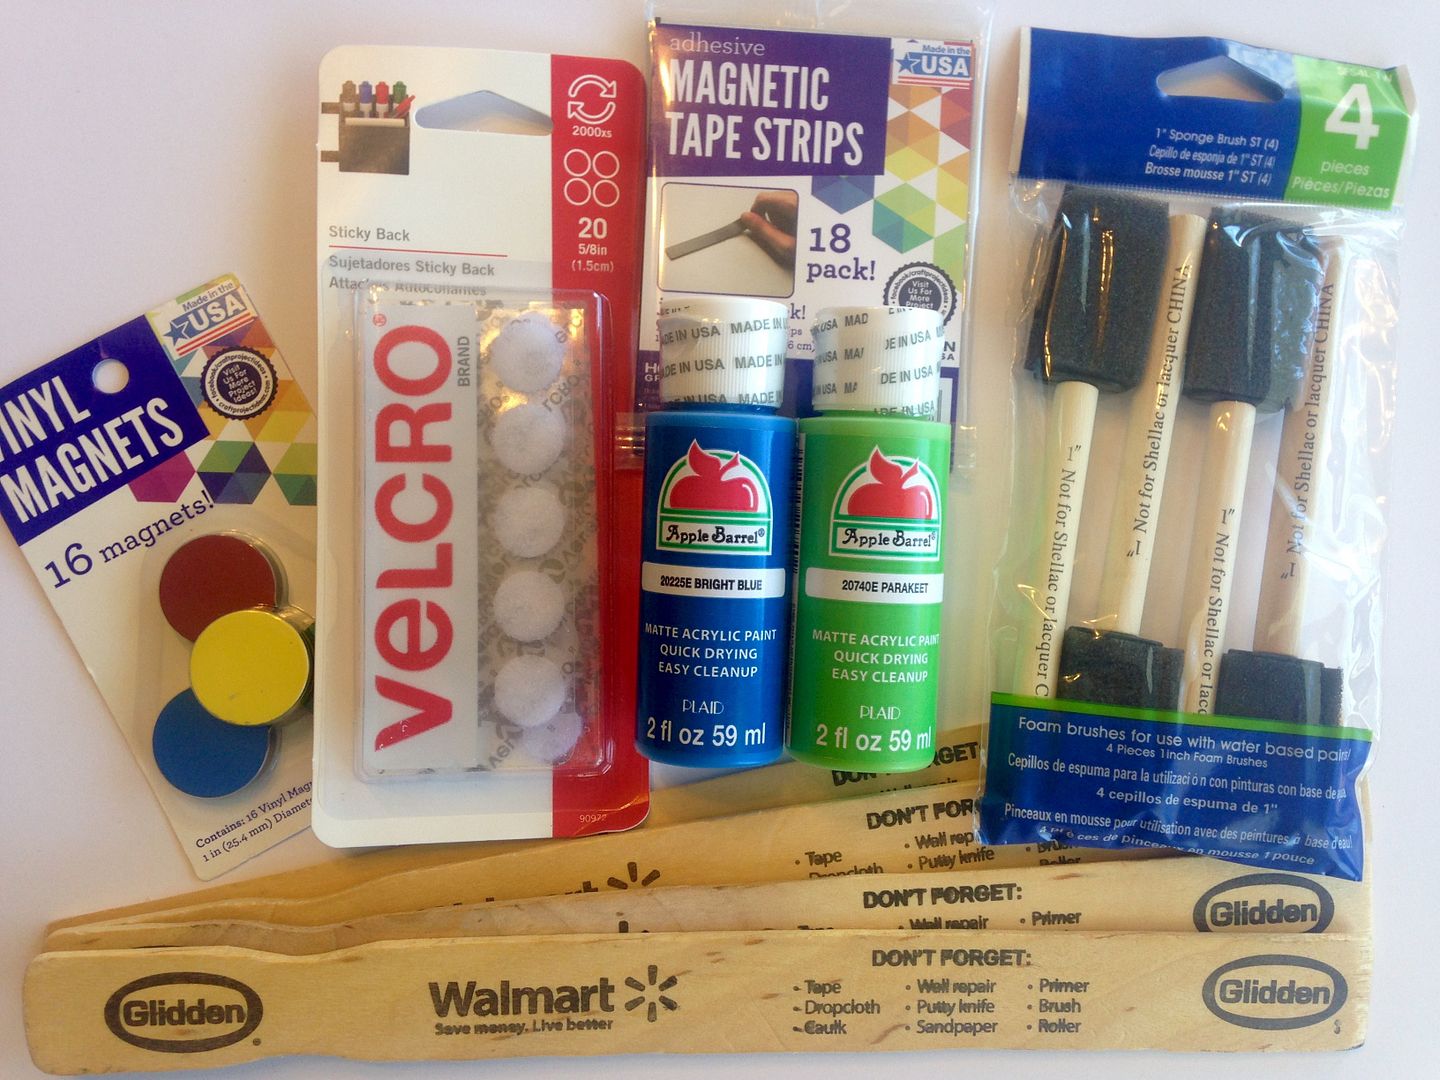
I gathered these materials at my local Wal-Mart including the paint stir sticks (they are free!). 


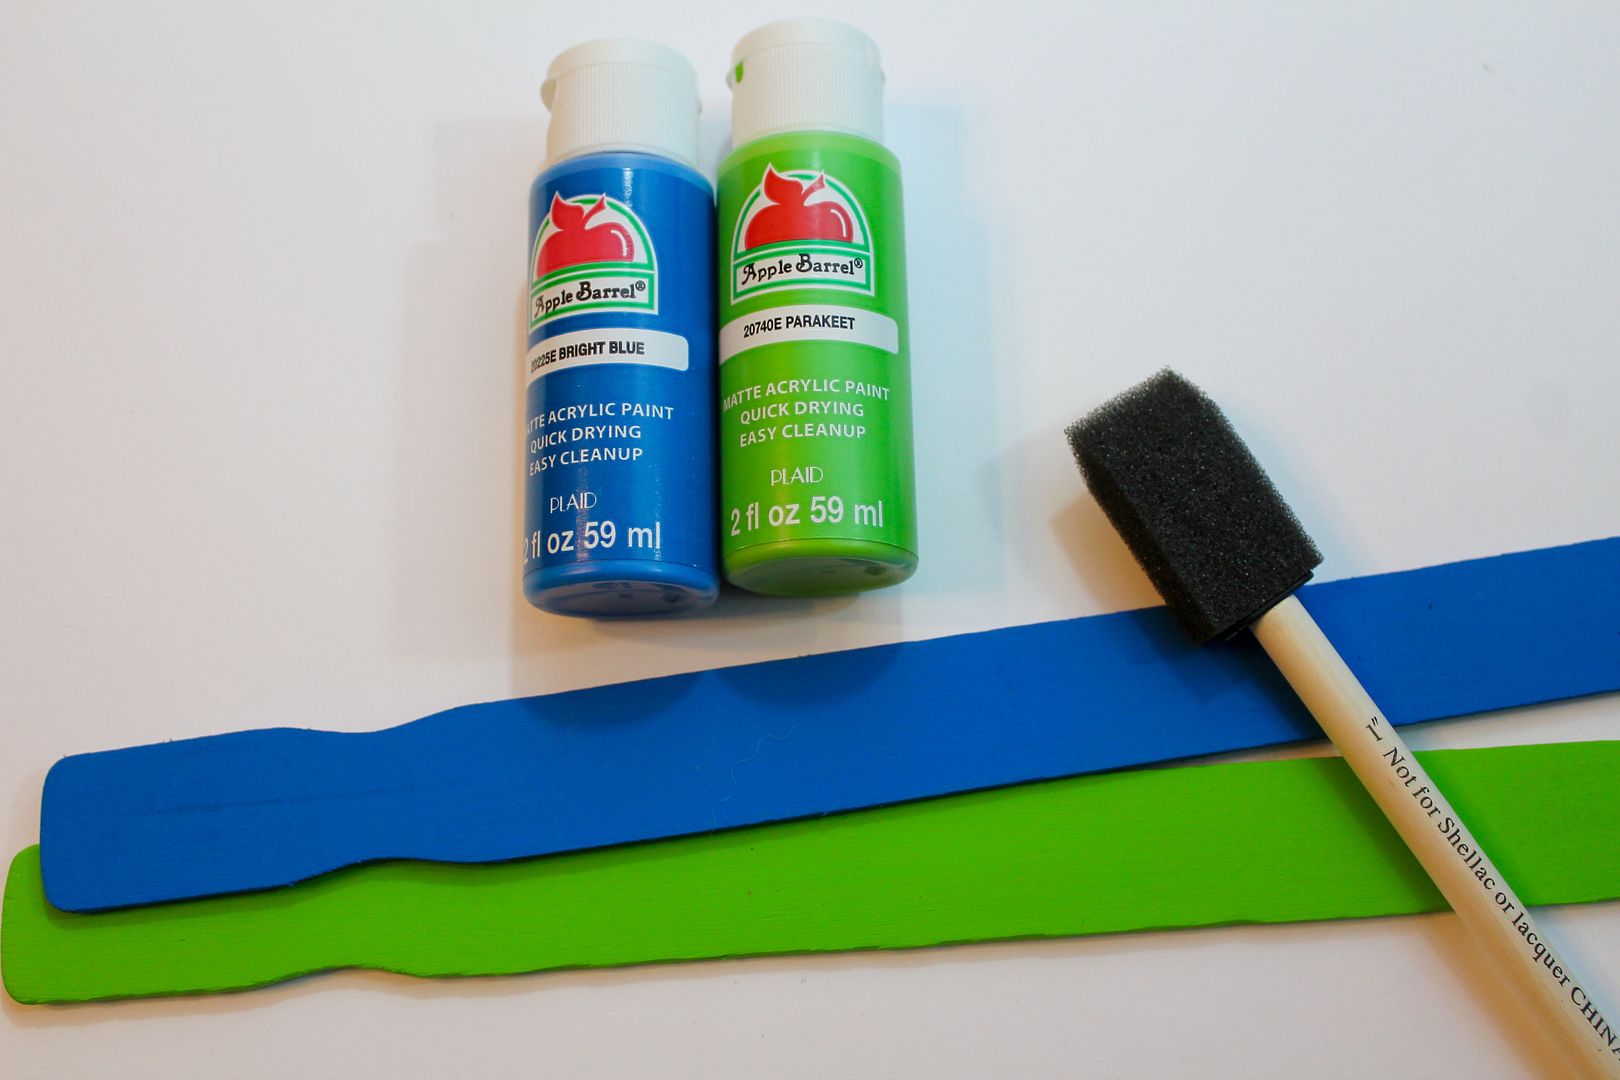
I painted the paint stir sticks and it took a few coats but they turned out great!

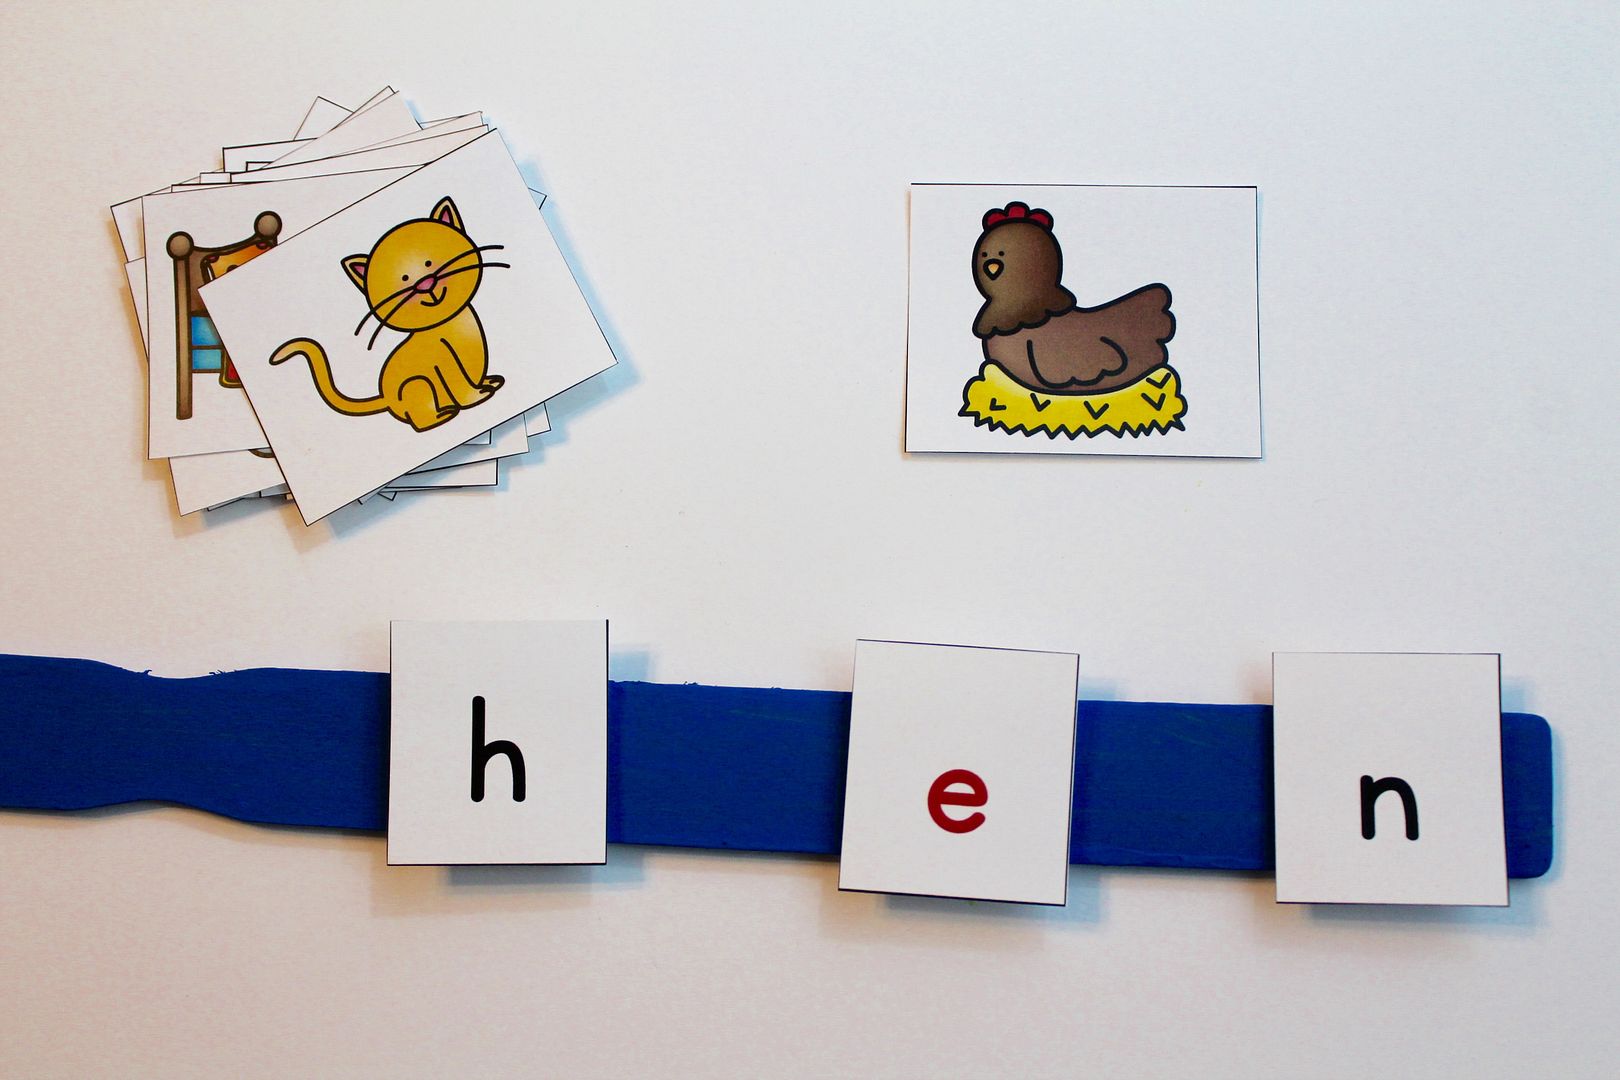
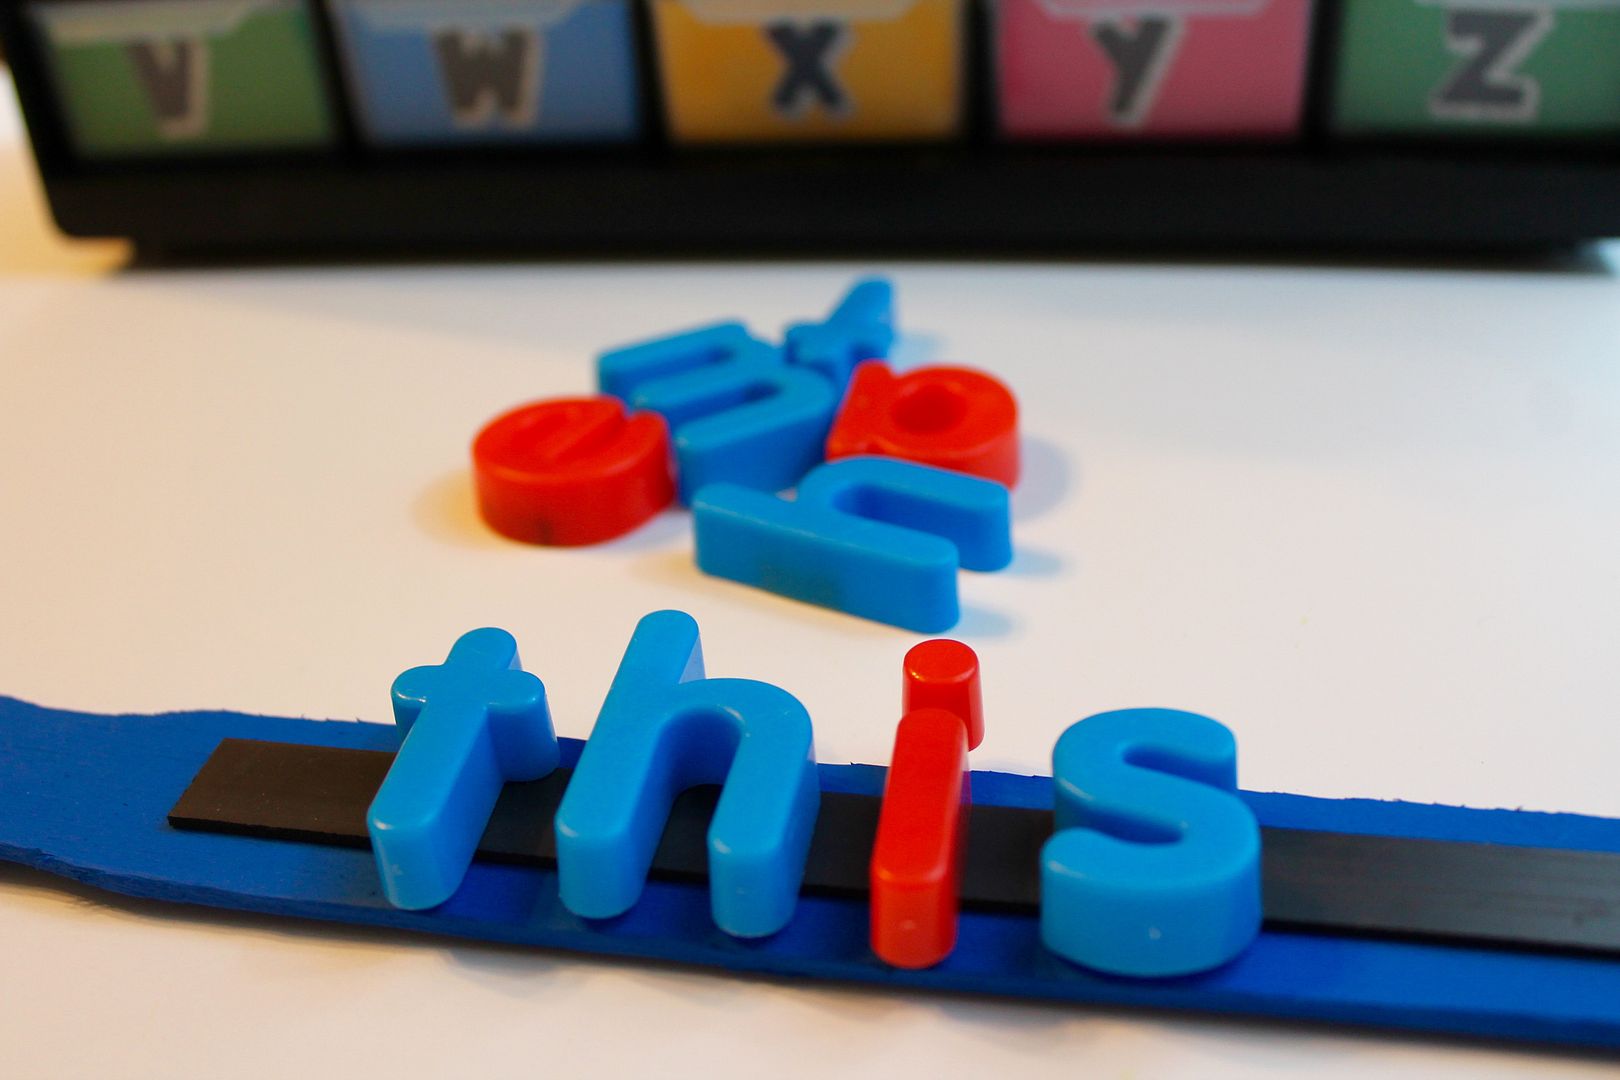
I knew I wanted to use both magnetic letters to build words and velcro letters, so on one side I adhered a magnetic tape strip and on the other side I placed 3 Velcro dots. When I'm working with my little scholars on building CVC words, the velcro side will work perfectly! 


If we're building sight words, they can just flip the stick over and build sight words like this. 


These paint stir sticks can also be used as a quick assessment. You can say the word, your little scholars can build the word in their laps, then on the count of three they can flash the word they've built. I love when I can build in opportunities for quick assessments into everyday activities! 

Click the picture below to download the printable letter tiles and CVC picture cards for free. 


Have fun building words with your little scholars! 


Monday, September 7, 2015

Create Lifelong Puzzlers!

My name is Christine Maxwell and my blog is Hand to Heart.

Crossword puzzles are said to be the most popular and widespread word game in the world for children and adults. You can instill the love of using words, along with the educational benefits and maybe create a lifelong puzzler with this beginner free puzzle.


 This is a great activity to teach the concept of crossword puzzles and review color words. It can be done one-on-one and in large or small groups.

The smaller the group being introduced, the easier to teach and observe while doing the activity. When working with a large class, depending on the age, it may be necessary to do it together step by step. You may need to do a copy of the activity along with them for all to see.

The first letter of each box is printed the color of the correct word, so the child knows where to start spelling the word. The student might notice that black and brown start in the same square, but the box is brown.

The color words are on the paper to help spell the words correctly. The numbered box is beside the word to help them locate the same square on the grid and the direction to write the word.
 

Find this FREE activity here: Free! My First Crossword Puzzle, a key is included. Enjoy!

Monday, August 17, 2015

DIY Word Building Mats


Hi everyone! Welcome to Make It Monday here on the iTeach Kinder Blog. It's Julie from Make, Take & Teach with a super fun project for helping your little learners use those letters and sounds to build words. Word building activities are a great way to support both phonemic awareness and phonics skills. You can purchase word building mats, but they can be so expensive. So, why not make your own?


All you'll need is poster board, decorative tape and a stapler. In an earlier attempt at this project I used Washi tape and it turned out okay. I much prefer using duck tape as it is a little sturdier.

Simply cut your poster board into a 5" x 9" rectangle. Measure one inch from the bottom and fold as shown below. 

Measure and fold your tape along the edges of the top portion of the board.

Now fold the one inch portion up and staple. Using an accent piece of tape (or even the same color), tape along the upper edge of the fold.

There you have it! Your very own word building mat. If you'd like to download the letter cards, just click the link.

Thanks so much visiting us on the iTeach Kinder blog. 

Monday, August 10, 2015

DIY Alphabet Sound Tubs

Hi everyone, it’s Laura from Over the 1stGrade Rainbow.  Today I’d like to share with you some ideas with you on how to make your own alphabet sound tubs!  


When I taught kindergarten, I had the alphabet sound tubs from Lakeshore Learning provided to me by my school.  I loved using them!  They were great for small groups and phonics activities.  When I moved from that school I couldn’t take them with me.  Then I was really sad when I saw how much they would cost me to buy a set of my own.  As much as I would have loved to buy those tubs, it was a lot cheaper to go the DIY route. So I decided to make some this summer!  

Instead of using tubs, I decided to buy this Akro-Mils 10124 24 Drawer Plastic Parts Storage Hardware and Craft Cabinet.  (When I had the loose tubs, they would often get misplaced.  I also had the metal organizer for them but it took up too much space for me.)  The drawers on this cabinet are just the right size.  

I added these alphabet labels from Preschool Homeschool.  It was a small price to pay to not have to make my own, although you could always do that too!  


After I had the cabinet set up with the labels, I started filling up the drawers.  Here is a list of places where I’ve found items to fill the drawers:
1.  Target Dollar Spot – I can never go to Target without at least doing a quick sweep of this section. My favorite things to get from the dollar spot are little plastic toys or seasonal table scatter that I can use for math manipulatives.  I borrowed from these sets to add to my new ABC drawers.
2.  garage sales – Parents at garage sales practically beg me to take the small bags of their children’s knick-knack toys.  Mention you are a teacher and they may cut the price or give them to you for free!
3.  home junk drawer – We all have one right?  I know mine is FULL of small miscellaneous junk.  Lots to choose from!
4.  my daughter’s toys – I’ve borrowed several things from her play food set to use with the tubs.  I borrow it for the week and then put it back when we are done with that letter sound.  
5.  my parent’s house:  the honey hole – My parents used to own a ceramic mold business.  My mom would paint the samples for the catalogs and trade shows.  She kept a bunch of these small figurine samples for the grand-kids to play with.  When I asked her if she had anything I could use for the tubs she offered up the samples.  You never know what people have, so be sure to ask your family and friends  if they’d like to help!
6.  TOOB Animals – I have several of these sets that we’ve used for sensory bins.  They also are a great size for alphabet tubs! 
*I added magnetic alphabet letters in the tubs.  I found them in the Target dollar spot, but I have also seen them at the Dollar Tree.


If you aren't interested in buying a cabinet like I did, you could recycled plastic food containers.  Before I decided to buy the cabinet I had started saving these salsa containers from a local market.  

I hope this post helps you start your own alphabet sound tubs.  I'm always happy to answer any questions!  Thanks for stopping by!

Saturday, June 13, 2015

Read it! Write It!

Hey guys and gals! It's Keri from Enchanted Kinder Garden.


I hope you're enjoying your summer if you're out. If you're not, hopefully you don't have toooooo many more days!

A few months ago, I needed something for my kids to work on in small groups and with a partner when they weren't with me that related to writing. I had a ton of those metal rings stashed away, toner to use, and some laminated sheets ready to be used. I decided to make what I call Read It! Write It! These cards and this book was a HUGE hit in my classroom. My students were motivated to practice writing out cvce words that we were still practicing as we neared the end of the year. I want to show and tell you all about one of my favorite tools!


Read It! Write It! has two components. The first part is a flap book. There are five sections to this book. CVC words, blends, digraphs, cvce, and rhymes. This book could be used for the entire year. You could add all of the parts or just add as needed.


Students use the book to read through each of the words with a partner. It can also be used in a spelling test type of way. One student can read a word while the other writes.


I also have made a set of smaller pictures. These can be used by the teacher or the students.

Here's how it works:
 Print, laminate, and cut all of the cards. Punch a hole in the corner of each of the smaller cards. Add these to rings. You do not have to add all of the same type of cards to the same rings. For example, you can have 8 cards on the cvc ring and add the rest to different rings.

 For organization, I've added which pile/type of words each card belongs to in case they are mixed up.


There is also a title page that goes with each tab. You can choose not to use this page if you'd like. To make your Read It! Write It! Flipper book, print, laminate and cut around each of the pages. Line up your cards in the same place and punch two holes. Add rings to make a book.


Here's how to use it:
 The small cards can be used in a partner style or with the teacher.  The students will flip through the cards and read each word. As they read it, they will write it. I let my kids get a sheet of writing paper, iPad with the Doodle Buddy app, or dry erase board to write on. If using with the teacher, the teacher can determine how and where they can write. I let my students write on our table with a dry erase.

With the book, the students will write the words as they read the picture. For the rhyming portion, they can produce a rhyming word or write a set of rhyming words. For the blends, students can just write the blend that they hear.


Thursday, June 11, 2015

Organizing Your Classroom Library

If you are anything like me you are obsessed with buying children's books for your classroom.  I can't believe how many books I have acquired over the years! And my husband couldn't either when he helped me move everything back home.  Oops! I can't tell you how many times I have organized, and reorganized, (and reorganized again) my classroom library.  If this is on your back to school to do list here is a little advice. 

1. Find some really sturdy bins.  

If you don't want to buy new ones year after year when the old ones break invest in some strong ones. If you are a bit OCD about things matching, also try to find ones that won't be discontinued every year when you have to buy more as your library size grows.  These are some great bins I found at Target 5 years ago for relatively cheap ($18 for 6 medium baskets).  
They come in a variety of colors and 3 different sizes and they've had them every year since. I usually find them in the home section or the fun colors are usually with the college dorm stuff at back to school time. I use the small baskets for leveled readers and a combination of medium and large baskets for my picture books, depending on how many books I have on a topic.

2. Sort books into piles.
Start making piles of categories of books. Think about the themes/units you teach, favorite authors, series books, class books, leveled books, magazines, etc.  If you have any piles that are huge, try to split them into smaller categories. And if you have piles with just a few books try to find ways to combine them. 

3. Find or create labels for your bins.
I created these for my own classroom. You can check them out in blue/green, black, or chevron here:
4. Attach labels to baskets.
I use velcro dots to attach my labels so they are easy to change if needed.  When a basket gets too full, I simply pull the label off, put it on a larger basket, transfer the books and I am done! 

5. Arrange baskets on shelves.
I like to put them in an order that I think makes sense and would be easy for students to use (i.e. animal books in the same area, favorite authors in the same area, etc.) 

6. Number the baskets.
On the labels I created I have a small circle in the corner that I number 1 through 40 while they are on the shelves so I know they are in order when students are looking to return books.

7. Label your books.
On the back of each one of my books I add a small circle sticker (the kind used for garage sales) and number them to match my baskets.  For leveled readers I label with the circle stickers and the letter to match it's level. 

If you want to get real fancy schmancy you could also choose to color code your picture books by level. When I taught first grade I labeled picture books that were easy (levels A-D) with green stickers, on level (levels E-J) with yellow stickers, and challenging (levels K+) with red stickers.  They still had the same number system for organization but when students looked through bins they could find just right books a bit easier. If you are looking for resources to level your books, I have used The Scholastic Book Wizard, The Classroom Organizer, Lexile.com, and Literacy Leveler.


Thanks for reading, and good luck getting organized!